If your AI coding agent keeps reading the same files every time you ask a question, it’s wasting time and tokens on work that could be answered almost instantly.
I’ve been using Claude Code and a few other AI coding agents with a medium-sized Django project for the past few months, and I kept noticing the same problem.
For example, if I asked, “What calls this function?“, the agent would start searching through a large part of the repository. It would consume thousands of tokens, take longer than necessary, and sometimes still miss a function call hidden deep inside the project.
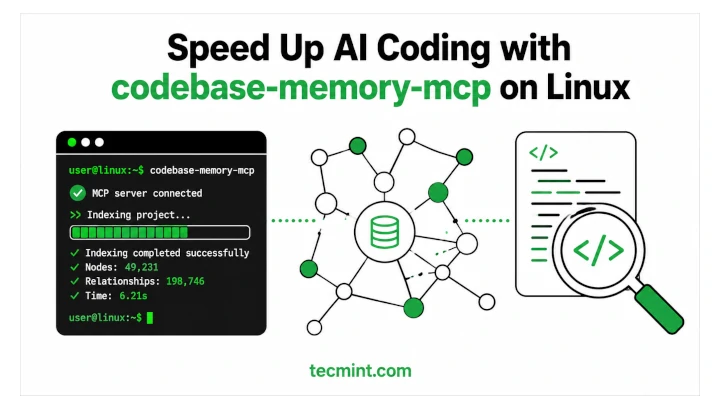
That’s where codebase-memory-mcp helps. Instead of scanning your project from scratch every time, it builds a knowledge graph of your codebase once. After that, the agent can answer structural questions by querying the graph, making responses much faster and more accurate.
The tool is written in C, distributed as a single static binary, requires no runtime dependencies, and supports 158 programming languages out of the box.
In this guide, you’ll learn how to install codebase-memory-mcp on Linux, connect it to your AI coding agent, build your first code index, and start running fast, context-aware queries.
What codebase-memory-mcp Actually Does
Before you install codebase-memory-mcp, it’s helpful to understand what it actually does.
This tool isn’t an AI model or coding assistant. Instead, it’s a code analysis backend that helps AI coding agents understand your project much more efficiently.
It uses tree-sitter to parse your source code and builds a knowledge graph containing information such as functions, classes, method calls, imports, HTTP routes, and other relationships within your project. This graph is then stored locally in a SQLite database.
When you ask your AI coding agent a question, tools like Claude Code, Codex CLI, Gemini CLI, and other MCP-compatible agents can query this graph through the Model Context Protocol (MCP) instead of scanning your project files from scratch every time. This makes responses much faster while using far fewer tokens.
The project’s benchmark results show just how much of a difference this can make. Five structural code queries that normally required around 412,000 tokens when exploring files directly used only about 3,400 tokens when answered from the knowledge graph. That’s roughly a 99% reduction in token usage.
The indexing process is also impressively fast. According to the project’s benchmarks, indexing the Linux kernel, which contains around 28 million lines of code spread across 75,000 files, takes about 3 minutes on an Apple M3 Pro.
Another advantage is that everything runs locally on your machine. The project also states that it collects no telemetry, so your code never has to leave your system.
Prerequisites
Before you begin, make sure you have the following:
- A Linux system running on either x86_64 or ARM64.
- An MCP-compatible AI coding agent already installed, such as Claude Code.
The good news is that you don’t need to install Docker, create a Python virtual environment, or configure any API keys. The installation script takes care of downloading the binary, placing it in the correct location, and configuring your coding agent automatically.
Step 1: Install codebase-memory-mcp
The easiest way to install codebase-memory-mcp on any Linux distribution is to use the one-line installer. Since the binary has no distribution-specific dependencies, the same command works across most Linux systems.
curl -fsSL | bash
Here’s what this command does:
curl -fsSLdownloads the installation script.-fstops the download if the server returns an error.-shides the download progress.-Sdisplays an error message if the download fails.-Lfollows any redirects from the GitHub URL.- Finally, the downloaded script is piped directly to
bash, which runs the installer.
If you also want to install the built-in 3D graph visualization UI, run the installer with the --ui option:
curl -fsSL | bash -s -- --ui
If the installer lists your coding agent under Detected agents, it has automatically configured the MCP integration.
If Detected agents is empty, make sure your coding agent’s configuration directory already exists, then run the installer again.
Step 2: Verify the Installation
First, make sure the codebase-memory-mcp binary is available in your system’s PATH by running:
which codebase-memory-mcp
If the installation was successful, you should see output similar to this:
/home/ravi/.local/bin/codebase-memory-mcp
If which doesn’t return anything, your shell can’t find the installation directory yet, so add it to your PATH manually:
export PATH="$HOME/.local/bin:$PATH"
To make this change permanent, add the same line to your ~/.bashrc or ~/.zshrc file, then reload your shell:
source ~/.bashrc
Next, verify that the binary is working and responding correctly:
codebase-memory-mcp --version
echo '{}' | codebase-memory-mcp
You should see output similar to this:
codebase-memory-mcp v0.8.1
{"jsonrpc":"2.0","id":null,"error":{"code":-32700,"message":"Parse error"}}
The JSON-RPC “Parse error” is expected in this case. It simply means the binary is running correctly and understands the MCP protocol, but the empty JSON object ({}) isn’t a valid MCP request.
Step 3: Restart Your Agent and Index a Project
Restart your AI coding agent so it can load the newly configured MCP server. If you’re using Claude Code, run the following command to verify that the MCP server is connected:
/mcp
You should see output similar to this:
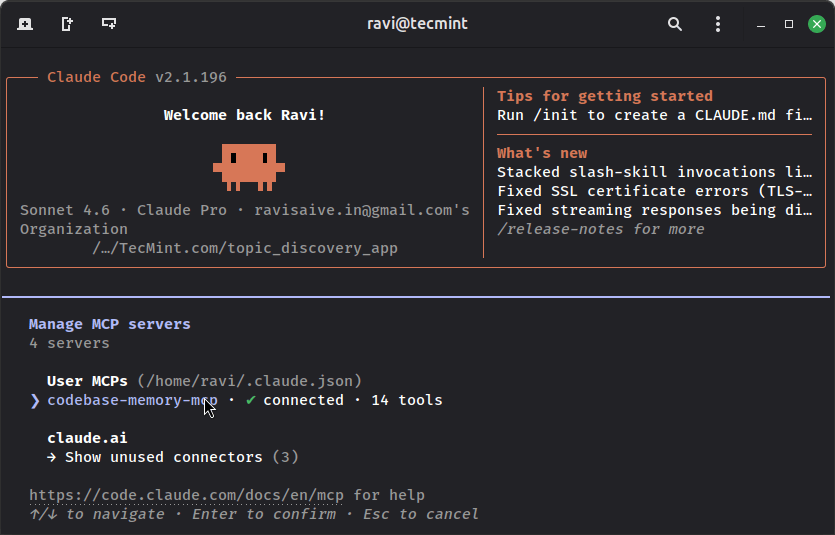
Seeing 14 tools means the MCP server loaded successfully, including tools for indexing, searching, tracing function calls, and analyzing your project’s architecture.
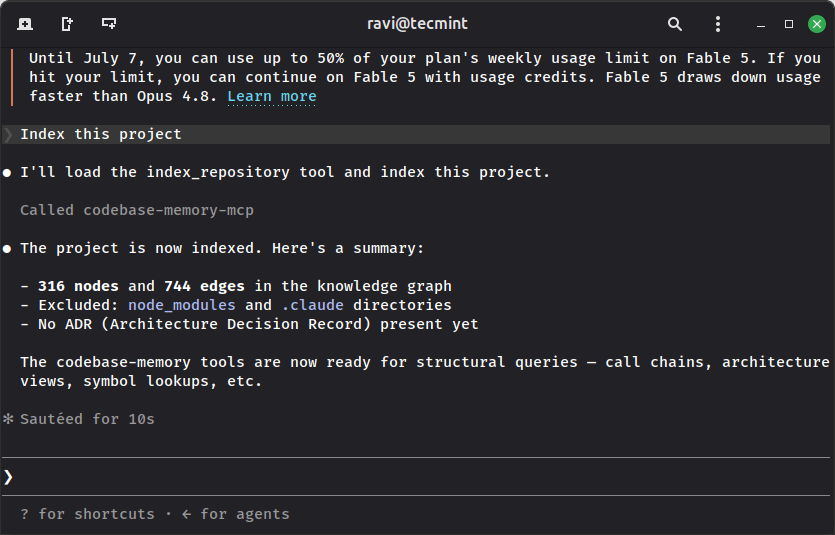
Next, index one of your projects.
Index this project
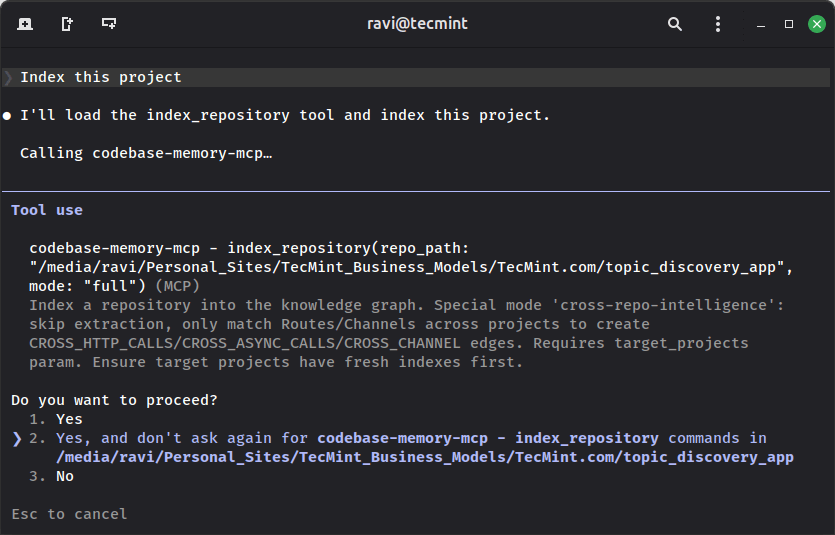
You can also start indexing directly from the terminal without using the chat interface:
codebase-memory-mcp cli index_repository '{"repo_path": "/home/ravi/projects/django-app"}'
A successful indexing operation produces output similar to this:
To check the indexing status or view indexed projects without blocking your terminal, run:
codebase-memory-mcp cli list_projects
Step 4: Query the Graph
Once your project has been indexed, you can start asking structural questions about your code. Instead of searching through files every time, the agent queries the knowledge graph to find the answers.
You can also query the graph directly from the command line. For example, to find all functions whose names contain Handler, run:
codebase-memory-mcp cli search_graph '{"name_pattern": ".*Handler.*", "label": "Function"}'
Here’s what each part of the command does:
search_graphinvokes the MCP search tool.name_patternuses a regular expression to match function or class names.labellimits the search to a specific node type, in this case, Function.
To see which functions call a specific function and which functions it calls, use:
codebase-memory-mcp cli trace_path '{"function_name": "process_order", "direction": "both"}'
For an unfamiliar codebase, being able to trace function relationships like this can save a lot of time compared to manually searching through files with grep command and jumping between source files.
Keeping It Updated
Since codebase-memory-mcp is installed as a standalone binary, you’ll need to update it manually unless you installed it through a package manager such as AUR, npm, or Homebrew.
To check for updates and install the latest version, run:
codebase-memory-mcp update
If you’re already using the latest release, you’ll see output similar to this:
Current version: v0.8.1
Latest version: v0.8.1
Already up to date.
The server also checks for updates automatically when it starts. If a newer version is available, it will notify you the first time you use one of its tools during that session, making it easy to keep your installation up to date.
Conclusion
If you regularly use AI coding agents to work with large projects, codebase-memory-mcp is a tool worth trying. The installation is straightforward, taking only a few minutes, and once your project is indexed, your coding agent can answer structural questions much faster by querying the knowledge graph instead of repeatedly scanning your source files.
Whether you’re tracing function calls, exploring class relationships, or navigating an unfamiliar codebase, the graph-based approach can significantly reduce both response time and token usage while providing more accurate results.
If you work with multiple projects, you can also index each repository separately and use the list_projects command to see all indexed codebases. This makes it easy to manage and switch between projects while taking advantage of fast, context-aware code analysis.
Have you tried pairing this with a specific agent beyond Claude Code, like Aider or Gemini CLI? I’d like to hear how the hook behavior compares across agents, so drop your setup in the comments.
If this article helped, with someone on your team.